How To Put Your Social Media Information Inside Google (In 3 Simple Steps)

How To Place Your Social Media Information Inside Google

Social Media in Google My Business

Have you ever wonder what will it want to get your social media info within Google? You know, that neat-looking set of social media icons that go slightly below your business info, permitting folks to directly navigate to your ‘social side’

Let’s face it – most people think that Google is great for showing online users results about businesses, services, products, and other general information. And the maximum amount as this is often utterly true, there’s one different facet of the story regarding Google.

The side which not only helps us see information but actually leads us to it.

And that is why Google is equally important for the success of businesses nowadays – and why they should do everything to get on Google. They are after all able to point potential customers to businesses and eventually help them become long-time, loyal customers of the brand.

But this is often just one of the various reasons why Google Maps is today essential to each business and its online success.
Now, if you thought that its’ easy to get on Google because the site automatically indexes every place out there and makes it virtually present on Google, you are wrong. Getting your social media information inside Google is a process – one which we are listing in steps today. So…

How To place Your Social Media info within Google (In three easy Steps)

If you would like to be told a way to get on Google exploitation your social media info solely, you’ll be able to try this in four easy steps – listed below.

Step 1: Create Your Line Of Code
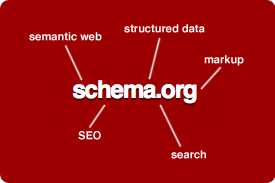
(Called Structured Markup)

You may feel like a developer while doing this, and that’s totally cool. This is actually a process where you create your unique list of information that Google will be able to find when it comes to your website and uses it accordingly.

Schema ORG

Here is that the line of code – you simply ought to replace the bolded links along with your social media profile links for each channel consequently.

{ “@context” : “http://schema.org”,

“@type”: “Organization”,

“name”: “Your Organization Name“,

“url”: “ http://www.your-site.com “,

“sameAs” : [ “ http://www.facebook.com/ your-profile “,

http://www.twitter.com/ yourProfile “,

http://plus.google.com/ your_profile “] }

Once you do this, you are halfway done with getting your social media information inside Google.

Step 2: Upload Your Structured Data


Now that you simply have replaced the code higher than along with your social media links, you need to add it to your website so that Google crawls it successfully. For most of us, that means the homepage.

The best way to put the code to your homepage is right before the closing </head> tag in the header section of your website. And in case you don’t know what this represents, just email this article to your webmaster and they will know what to do.

Step 3: Check Out If It Works

Once your code is added, it should work. But so as to create positive that it works, visit the Google Testing Tool, click on ‘Fetch URL’ and type in your website’s address. The tool will automatically copy the same structured data showing up in the testing tool – and light up green (with an ‘All good’ message and a tick) if the entire process is successful.

In case you did not succeed in the entire process, don’t stress.

The next time the robots crawl your web site, they’re going to with success place your social media info within Google – and you’ll simply get on Google with all of your social icons.

Speaking of social media….Have you ever wondered how your social media posts score when it comes to OpenGraph?

‘Open-what?’ – is probably what you are thinking right now…

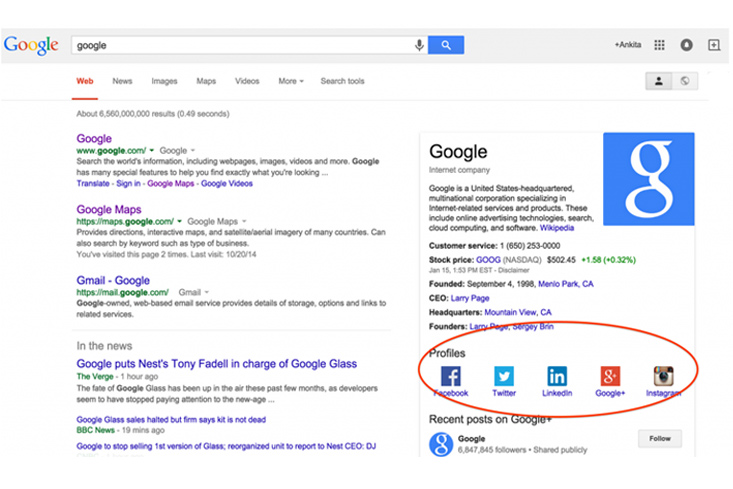
Social Profiles Google Supports

Currently, Google only allows specific social networks to their knowledge panels. They encourage you to add others (like Pinterest!), but the profiles they support include:

Social Media Profiles

  • Facebook
  • Twitter
  • Google+ (shocking, I know)
  • Instagram
  • YouTube
  • LinkedIn
  • Myspace (Really, Google? MySpace…)

According to Google, the Google algorithm processes the social networks you have identified and shows the most relevant results.

How To Use Open Graph – And What’s It All About

The best way to explain what Open Graph is all about is to describe it as the standard that all social media posts should adhere to. Basically, learning how to use Open Graph will help you make most of all your posts – and make them appear better to your readers.

Basically, Open Graph simulates that box that automatically pops up below on Facebook, Twitter and any other social media network whenever you share a link. In order to learn how to use it.

Now…

Open Graph is a language that uses three different code lines:

  • og:title – simulating the title of the post
  1. <meta property=”og:title” content=”Your eye-catching title here” />
  • og:url – simulating the canonical URL for the page you are sharing
  1. <meta property=”og:url” content=”http://www.yourdomain.com” />
  • og:type – simulating the kind of object you are sharing, whether it’s a blog post, video or a picture
  1. <meta property=”og:type” content=”website” />

Once you hit ‘Inspect Element’ in your browser and locate these codes, you will be able to edit the information in the boxes that automatically appear below the links you are sharing.

Who thought that is possible, right?

AS a Final Word

So today, we learned two valuable things. How to place your social media info within Google and the way to use Open Graph to alter what you post on your social networks.

We hope that obtaining your social media profiles listed on Google Maps can facilitate your business on a usual to boost your website’s complete awareness and visibility!

Important Shortcut Keys For Windows Operating System

Important Shortcut Keys System

Keyboard shortcuts


CTRL+A. . . . . . . . . . . . . . . . . Select All

CTRL+C. . . . . . . . . . . . . . . . . Copy

CTRL+X. . . . . . . . . . . . . . . . . Cut

CTRL+V. . . . . . . . . . . . . . . . . Paste

CTRL+Z. . . . . . . . . . . . . . . . . Undo

CTRL+B. . . . . . . . . . . . . . . . . Bold

CTRL+U. . . . . . . . . . . . . . . . . Underline

CTRL+I . . . . . . . . . . . . . . . . . Italic

F1 . . . . . . . . . . . . . . . . . . . . . . Help

F2 . . . . . . . . . . . . . . . . . . . . . Rename selected object

F3 . . . . . . . . . . . . . . . . . . . . . Find all files

F4 . . . . . . . . . . . . . . . . . . . . . Opens file list drop-down in dialogs

F5 . . . . . . . . . . . . . . . . . . . . . Refresh current window

F6 . . . . . . . . . . . . . . . . . . . . . Shifts focus in Windows Explorer

F10 . . . . . . . . . . . . . . . . . . . . Activates menu bar options

ALT+TAB . . . . . . . . . . . . . . . . Cycles between open applications

ALT+F4 . . . . . . . . . . . . . . . . . Quit program, close current window

ALT+F6 . . . . . . . . . . . . . . . . . Switch between current program windows

ALT+ENTER. . . . . . . . . . . . . . Opens properties dialog

ALT+SPACE . . . . . . . . . . . . . . System menu for current window

ALT+¢ . . . . . . . . . . . . . . . . . . opens drop-down lists in dialog boxes

BACKSPACE . . . . . . . . . . . . . Switch to parent folder

CTRL+ESC . . . . . . . . . . . . . . Opens Start menu

CTRL+ALT+DEL . . . . . . . . . . Opens task manager, reboots the computer

CTRL+TAB . . . . . . . . . . . . . . Move through property tabs

CTRL+SHIFT+DRAG . . . . . . . Create shortcut (also right-click, drag)

CTRL+DRAG . . . . . . . . . . . . . Copy File

ESC . . . . . . . . . . . . . . . . . . . Cancel last function

SHIFT . . . . . . . . . . . . . . . . . . Press/hold SHIFT, insert CD-ROM to bypass auto-play

SHIFT+DRAG . . . . . . . . . . . . Move file

SHIFT+F10. . . . . . . . . . . . . . . Opens context menu (same as right-click)

SHIFT+DELETE . . . . . . . . . . . Full wipe delete (bypasses Recycle Bin)

ALT+underlined letter . . . . Opens the corresponding menu

PC Keyboard Shortcuts

Document Cursor Controls

HOME . . . . . . . . . . . . . . to beginning of line or far left of field or screen

END . . . . . . . . . . . . . . . . to end of line, or far right of field or screen

CTRL+HOME . . . . . . . . to the top

CTRL+END . . . . . . . . . . to the bottom

PAGE UP . . . . . . . . . . . . moves document or dialog box up one page

PAGE DOWN . . . . . . . . moves document or dialog down one page

ARROW KEYS . . . . . . . move focus in documents, dialogs, etc.

CTRL+ > . . . . . . . . . . . . next word

CTRL+SHIFT+ > . . . . . . selects word

Windows Explorer Tree Control

Numeric Keypad * . . . Expand all under current selection

Numeric Keypad + . . . Expands current selection

Numeric Keypad – . . . Collapses current selection

¦ . . . . . . . . . . . . . . . . . . Expand current selection or go to first child

‰ . . . . . . . . . . . . . . . . . . Collapse current selection or go to parent

Special Characters

‘ Opening single quote . . . alt 0145

’ Closing single quote . . . . alt 0146

“ Opening double quote . . . alt 0147

“ Closing double quote. . . . alt 0148

– En dash. . . . . . . . . . . . . . . alt 0150

— Em dash . . . . . . . . . . . . . . alt 0151

… Ellipsis. . . . . . . . . . . . . . . . alt 0133

• Bullet . . . . . . . . . . . . . . . . alt 0149

® Registration Mark . . . . . . . alt 0174

© Copyright . . . . . . . . . . . . . alt 0169

™ Trademark . . . . . . . . . . . . alt 0153

° Degree symbol. . . . . . . . . alt 0176

¢ Cent sign . . . . . . . . . . . . . alt 0162

1⁄4 . . . . . . . . . . . . . . . . . . . . . alt 0188

1⁄2 . . . . . . . . . . . . . . . . . . . . . alt 0189

3⁄4 . . . . . . . . . . . . . . . . . . . . . alt 0190

PC Keyboard Shortcuts

Creating unique images in a uniform world! Creating unique images in a uniform world!

é . . . . . . . . . . . . . . . alt 0233

É . . . . . . . . . . . . . . . alt 0201

ñ . . . . . . . . . . . . . . . alt 0241

÷ . . . . . . . . . . . . . . . alt 0247

File menu options in current program

Alt + E Edit options in current program

F1 Universal help (for all programs)

Ctrl + A Select all text

Ctrl + X Cut selected item

Shift + Del Cut selected item

Ctrl + C Copy selected item

Ctrl + Ins Copy selected item

Ctrl + V Paste

Shift + Ins Paste

Home Go to beginning of current line

Ctrl + Home Go to beginning of document

End Go to end of current line

Ctrl + End Go to end of document

Shift + Home Highlight from current position to beginning of line

Shift + End Highlight from current position to end of line

Ctrl + f Move one word to the left at a time

Ctrl + g Move one word to the right at a time

MICROSOFT® WINDOWS® SHORTCUT KEYS

Alt + Tab Switch between open applications

Alt +

Shift + Tab

Switch backwards between open

applications

Alt + Print

Screen

Create screen shot for current program

Ctrl + Alt + Del Reboot/Windows® task manager

Ctrl + Esc Bring up start menu

Alt + Esc Switch between applications on taskbar

F2 Rename selected icon

F3 Start find from desktop

F4 Open the drive selection when browsing

F5 Refresh contents

Alt + F4 Close current open program

Ctrl + F4 Close window in program

Ctrl + Plus

Key

Automatically adjust widths of all columns

in Windows Explorer

Alt + Enter Open properties window of selected icon

or program

Shift + F10 Simulate right-click on selected item

Shift + Del Delete programs/files permanently

Holding Shift

During Bootup

Boot safe mode or bypass system files

Holding Shift

During Bootup

When putting in an audio CD, will prevent

CD Player from playing

WINKEY SHORTCUTS

WINKEY + D Bring desktop to the top of other windows

WINKEY + M Minimize all windows

WINKEY +

SHIFT + M

Undo the minimize done by WINKEY + M

and WINKEY + D

WINKEY + E Open Microsoft Explorer

WINKEY + Tab Cycle through open programs on taskbar

WINKEY + F Display the Windows® Search/Find feature

WINKEY +

CTRL + F

Display the search for computers window

WINKEY + F1 Display the Microsoft® Windows® help

WINKEY + R Open the run window

WINKEY +

Pause /Break

Open the system properties window

WINKEY + U Open utility manager

WINKEY + L Lock the computer (Windows XP® & later)

OUTLOOK® SHORTCUT KEYS

Alt + S Send the email

Ctrl + C Copy selected text

Ctrl + X Cut selected text

Ctrl + P Open print dialog box

Ctrl + K Complete name/email typed in address bar

Ctrl + B Bold highlighted selection

Ctrl + I Italicize highlighted selection

Ctrl + U Underline highlighted selection

Ctrl + R Reply to an email

Ctrl + F Forward an email

Ctrl + N Create a new email

Ctrl + Shift + A Create a new appointment to your calendar

Ctrl + Shift + O Open the outbox

Ctrl + Shift + I Open the inbox

Ctrl + Shift + K Add a new task

Ctrl + Shift + C Create a new contact

Ctrl + Shift+ J Create a new journal entry

WORD® SHORTCUT KEYS

Ctrl + A Select all contents of the page

Ctrl + B Bold highlighted selection

Ctrl + C Copy selected text

Ctrl + X Cut selected text

Ctrl + N Open new/blank document

Ctrl + O Open options

Ctrl + P Open the print window

Ctrl + F Open find box

Ctrl + I Italicize highlighted selection

Ctrl + K Insert link

Ctrl + U Underline highlighted selection

Ctrl + V Paste

Ctrl + Y Redo the last action performed

Ctrl + Z Undo last action

Ctrl + G Find and replace options

Ctrl + H Find and replace options

Ctrl + J Justify paragraph alignment

Ctrl + L Align selected text or line to the left

Ctrl + Q Align selected paragraph to the left

Ctrl + E Align selected

WordPress plugins tips and tricks

Top 5 css plugins for WordPress

  1.  Advanced CSS Editor
  2. WP Customizer Pro
  3. TJ Custom CSS
  4. SiteOrigin CSS
  5. Visual CSS Style Editor

Best 3 seo plugins for WordPress

1. Yoast SEO

2. ALL-in- ONE SEO Pack 

3. The SEO Framework

Top 5 seo optimized themes for WordPress

1. Observe Theme.

2. Divi Theme

3. Schema Theme

4. SEO WP Theme

5. Extra Theme

Top 5 useful plugins for WordPress

1. Everest Forms (FREE)

2. Jetpack (Free)

3. Akismet (Free)

4. Yoast SEO (Free)  (Paid)

5. W3 Total Cache(Free)

Top 5 useful tips for wordpress

1. Remove WordPress Version Number

2. Add a Custom Dashboard Logo

3. Change the Footer in WordPress Admin Panel

4. Add Custom Dashboard Widgets in WordPress

5. Change the Default Gravatar in WordPress

10 things to do after installing wordpress 

1. Change the Admin Password and Manage Your Author

2. Edit Permalinks

3. Upload Your Theme and Activate

4. Add Your Categories and Change the Default

5. Activate Akismet

6. Install Google XML Sitemaps

7. Install WordPress Database Backup

8. Test Your Blog With Dummy Content

9. Add your RSS feed to Feed-burner

10. Activate your Analytics

5 essential tips for wordpress beginners

1. Your sidebar isn’t your hall closet

2. Make it easy to find what’s in your library

3. Clean up your permalinks

4. Maximize impact with targeted titles and descriptions

5. Put your images to work for you

This all will help you to get a better result of your WordPress sites.


Social Media Optimization

Introduction

SMO stands for Social Media optimization. In other words “Social Media Optimization helps to increase the visibility of your website’s Social media profiles, social activities and published content, which helps people to search the resources and information related to your content. Moreover, it helps to drive traffic to your blog or website, make it easy to share for others in their circle, create a community around your brand and helps search engines to index your social media activities, social profiles and blog posts with ease.

Role of social media

1. Ensures a strong presence among the customers – With SMO, you can ensure a strong presence for the business and the brand on the internet and amongst the customers. It introduces the business to new people, improving the visibility of the brand and maintaining the online reputation.

2. Increases the reach- SMO provides a way to reach the niche (targeted) audience. You get to know what they want and present it to them. You can reach them via videos, infographics, target mobile users and more.

3. Drive more traffic- Social media platforms are a great source to drive traffic to the website as it allows to reach the customers worldwide. That too, without any investment.

4. Creating a buzz- You can create a buzz in the audience about your venture. Whether you are organizing an event, launching a new product, or having a part, make your customers a part of it.

5. Improves Search Engine Ranking – SMO along with SEO helps to improve the ranking of the website on the search engine. Since the search engines collect data from social media such as Google + and show them in the results, it has gained importance.

Which social media platform to use

There are a large number of social media platforms out there. So which platforms should we choose? Should we choose all that are trending or to choose the ones we are familiar with?

When it comes to the selection of social platforms, one should check where its target audience is most active. These are the platforms that should be chosen, rather than being active and putting efforts on everyone. Be active on a few, create your base and attract the customers, then you can think of other platforms.

Top social media platforms

Some of the best social media platforms Facebook, Twitter, LinkedIn, Instagram, Pinterest, for a crumb. With the increase in the number of users using Pinterest, we can also consider it as a social media platform that drives a lot of users to the website and also helps in creating quality backlinks.

Google Analytics v/s Google Webmaster Tools: What is the Difference

Did you know that Google offers more than 100 products, tools and services, including Google Analytics and Google Webmaster Tools?  Google provide this for the improving of a website ranking and other features in it,While all of these products add some value for website owners, two that are particularly important for digital marketers are Google Analytics and Google Webmaster Tools.


Google Analytics

This free tool provides full website traffic statistics including total visits, average time on site, and bounce rate. In addition, Google Analytics shows you a website’s audience and demographic. When you want to know how people are finding your site and how they are engaging with it, Google Analytics can tell you.

Google Analytics also integrates with a variety of products including Adsense, Google+ and AdWords. If you are using select Google products, then you can integrate your campaigns within Google Analytics for tracking and reporting purposes.

google analytics

GOOGLE WEBMASTER TOOLS

Google Webmaster Tools provides information that can help you improve your site’s visibility in search. You can see how many impressions your site is generating in search engines, by keyword or by page. You can also monitor click-through rates from search engine results pages to your site. You may also want to upload an xml sitemap to help Google crawl your site, or check for crawl errors. Perhaps most importantly, having a verified Google Webmaster Tools account allows Google to tell you about technical problems with your site, such as an increase in 404 (not found) errors.

webmaster tools
webmaster tool

A simple way to describe the difference between Google Analytics and Google Webmaster Tools is this: Webmaster Tools reports on how search engines interact with your site, while Google Analytics reports on how website users interact with your site. Whether you are personally managing your brand’s digital presence or working with a third-party, both Google Analytics and Google Webmaster Tools provide valuable and actionable information. And the best part is, they’re both free.


     Aiswarya Thampi

How to create a blog post

Blog Post on WordPress

logo of wordpress

Title and Content Boxes

Title and Content Boxes are the most noticeable areas on the Add New Post screen. Yours might look slightly different depending on whether you are using the visual or the text editor.

You can switch between visual and text editor while writing a post, but we do not recommend switching as this could mess up your post’s formatting.

Visual Editor is a beginner-friendly text editor with formatting buttons and a nice visual layout for the content area. On the other hand, the text editor is a plain text editor where you can actually see the HTML or write your own.

The first text area on the top is where you add the post’s title. If you are using SEO Friendly URL structure, then WordPress will auto-generate post URL based on the title. You can edit the URL by clicking on the edit button.

The content area is where you will write your post. You can use the formatting options from the toolbar or use one of the many keyboard shortcuts available which will speed up your writing process.

If you are using the visual editor, then you may want to take a look at these 14 tips for mastering the WordPress visual editor.

In the footer area of the content editor, WordPress will show you the word count for your post. If you want to get even more detailed word count stats, then check out our tutorial on how to get word count stats in WordPress with Word Stats.

As you write, WordPress will automatically save a draft of your post. This autosave is stored in your WordPress database temporarily.

New post

As soon as you save your draft or write more content, WordPress cleans up your autosave temporary draft and replaces it with a new one. This process ensures that you do not lose your content due to internet connection or hardware failure. See our guide on how to undo changes in WordPress with post revisions.

The post editor shows your current draft and autosave status in the footer next to word count.

Add Images and Media

Between the title and content fields, there is a large Add Media button. You will need to click on it when you want to upload an image or any other media to your WordPress post. This will launch the media uploader in a popup window.

Media uploader popup in WordPress

Simply click on the select files button to upload images or any other media to your WordPress site. You can also create image galleries and audio playlists from uploaded files.

WordPress comes with some basic image editing tools. See our tutorial on how to edit, flip, rotate, and crop images in WordPress.

media
Add Media

Publishing Options

The WordPress post edit screen is divided into two columns. The column on your left contains the post title and content editor. On your right-hand side, you have different meta boxes to configure post settings.

The topmost meta box in this column is labeled Publish. This is where all the publishing options for your posts are managed.

1. Save Draft button stores a draft of the post or page that you are working on. WordPress also auto-saves your posts as you write them.

2. The preview button shows a live preview of your post. You can use it to see how your post will look after publishing.

3. The status allows you to set a status for your post. WordPress automatically handles post status for drafts and published posts. Unless you are using a plugin to add custom statuses, you don’t need to worry about this option.

4. Click on the Edit link next to visibility to expand it. The first option under visibility will allow you to make your post sticky on the front-page. Sticky posts in WordPress are like featured content that is displayed on top of all other posts.

5. The next option allows you to password protect a post in WordPress.

6. The third option under visibility is labeled private. This allows you to privately publish a post on your WordPress site. The private posts will be visible to users who have the editing privileges on your site.

7. Click on the edit link next to Publish, and WordPress will display the time and date options. You can use this option to schedule posts or create a backdated post in WordPress.

8. Move to trash allows you to delete a WordPress post. Deleted posts live under trash, and you can restore them if you need to for up to 30 days.

9. Finally, the publish button makes your WordPress post public. Remember if you scheduled a post, then it will appear on your site on the scheduled date and time.

pulish a post

Adding categories and tags to your WordPress posts

You can sort your posts into categories and tags. The categories and tags meta boxes usually appear in the right-hand column, below the publish meta box. Categories and tags help you organize your content in a meaningful and browsable format. Not only your users can easily find your content, but it also boosts your site’s SEO. See our guide on the difference between categories and tags and how to use them to sort your content.

 Aiswarya Thampi

How to use Bing Webmaster Tools for beginners

Bing Webmaster Tools offers several useful reports and features to analyze and optimize the visibility of your website in Bing – analogous to the Google Search Console in Google. It will show you how to set up Bing Webmaster Tools for your website and provide an overview of the most important reports and features on it.

Set-up of Bing Webmaster Tools

To get started with Bing webmaster tools, you need to add and configure your website.

1.Add Your Website

First of all you need to create a microsoft account or sign up with google ,facebook . Now you can add and verify your website under “My Sites”. There are three possible verification methods:

  1. XML file, which needs to be uploaded to the root directory of your website.
  2. Meta tag authentication: Add the meta tag from Bing Webmaster Tools in the section of your website.
  3. Add the Bing CNAME record to your DNS (Domain Name System). To do this, you need access to the hosting account of your domain.
  4. Configure Your Website
site add
add a site in bing

 2.Configure  Your Websit

After you have added your website to Bing Webmaster Tools, you can configure it. The most important configuration step is

Submit URLs: If your website is new or not yet in the Bing index for other reasons, you should manually submit the most important pages. You can submit 10 pages per day and 50 per month.

site configuration
configure your site

Diagnostics & Tools > Markup Validator: This tool allows you to check the structured data markups that Bingbot identifies on your website.

How to Start a WordPress Free Blog on WordPress.com

To create a WordPress blog it is a simple process. There are five steps on how to start a blog WordPress. All you want to do is go to wordpress.com and press the start button and it will help you set up your blog.

  1. First, choose a homepage layout
  2. Then, choose a theme
  3. Next, choose a domain (blog address/blog name)
  4. Pick a plan
  5. Create your account

Step 1: The first step is to choose a homepage layout for your WordPress free blog

There are four options on it. I would recommend “A list of my latest posts” because this is the most common format for a blog.

If you are a photographer or have really nice photos, then you should choose “a grid of my latest posts”.

For businesses, “a welcome page for my site” or “online stores appropriate.

home page layout

Step 2. Choose A Theme

A theme is what your blog looks like. Don’t worry – you can change the theme including the colors and pictures later!

If you pick something similar to what you’re looking for now, it will save you a little time down the road.

Theme Options

theme


Step 3. Choose A Domain (Blog Address/Blog Name)

Unfortunately, it’s pretty difficult to find a unique and somewhat catchy blog address on WordPress.com because most of them are already taken.

Here’s what I tried to get: lenin, lenin331, lenin222 – but they were all unavailable.

Finally, I was able to get myself registered but the blog name turned out pretty clumsy – leninweb.wordpress.com

Should I buy a domain name?

If you are considering buying your own domain, WordPress.com is not the best place

Don’t worry – you don’t have to buy a domain from WordPress in order to use their blogging software.

What blog name should I pick?

I recommend you to continue looking until the point when you discover something great. Take some time off and conceptualize with thoughts and names.  If you can’t choose, utilizing your genuine name is fine.

Probably the most renowned bloggers have their name in the area, and you won’t be bolted into expounding on one theme.

Step 4. Pick A Plan

Once you have completed the basics steps including your blog name you need to click on the Select Free button.

There is no need to use the paid version since it’s quite expensive and does not give you many advantages.

plan

Step 5. Create your account

E-mail Address: That’s obviously the e-mail address you are using the most. In my case, it would be a Gmail account.

Username: It doesn’t really matter. I tried to use my personal name, but unfortunately, it was taken. If your desirable username is not free, then add some numbers until it’s unique. Don’t worry, this will not be your blog name.

Password: Strong one! I suggest you use special characters like “^^” or “(/&#” and different numbers. There are lots of ugly hackers try to break into blog lately.

How do I log-in? A note on WordPress login

Now you are almost done! But before you can start blogging you need to verify your email address.

Simply head over to your mail and hit the “verify” link (it should appear in few seconds). Once you have done that, feel free to log in from http:wordpress.com/wp-admin.

login page

Customizing your blog and creating your first post

Now, log-in and let’s move forward. The WordPress dashboard is quite straightforward and user-friendly.

However, before you start blogging, you might want to change the theme – the design of your blog. You can do it by clicking on “Appearance” -> “Themes” (at the left sidebar).

As you can see, there are lots of different themes. Some of them are paid, some of them free. Don’t go crazy and buy a premium theme right away because the prices are quite high.

Start with a free theme and see how it goes. Keep in mind that you can change it whenever you want. Even 10 times a day if that’s your wish!

When I registered a blog on WordPress.com, I managed to found a pretty decent theme which is called “Truly minimal”. It’s clean and neat and I personally love it.

It also fits pretty well to the overall blogging nice. To activate the theme, click on “active”. They’re more than 200 different themes to choose from so feel free to use other themes.

Adding new pages and blog posts

To create new posts and pages you have to use the dashboard options. For posting use “Post” -> “New” and for pages use “Page” -> “Add new”.

I usually don’t bother myself much with pages. In short, “pages” are usually your Contact or About me location while posts are your blogging posts.

So let’s create a first blog post and see how it goes. In order to do that, you have to click on “Post” and then on the “Add new”.

Here’s an example of my first blog post (you need to click on “Publish” to make it live).

After you hit the Publish button, you can add some “tags” to make it more “searchable”. In other words, if you add some tags, it’s easier to find your blog from the many WordPress blogs on search engines.

However, don’t be too excited since new blogs won’t get much traffic at first. You have to promote it, share it with your friends, colleagues and use twitter/Facebook, etc.

Now You Know How to Start a WordPress Blog

As you can see, it wasn’t difficult at all. In fact, it only took me 4 minutes and 52 seconds. I hope you now know how to start a WordPress blog yourself now.

Aiswarya Thampi

For more details

SEO Evolution and Google Updations

On page SEO DetailsOn page SEO Details

Web Master Tools

Google Analytics

Feedburner For Email Subscription | Step by Step


Feedburner For Email Subscription

Owner: Google (purchased on June 3, 2007)

Website: feedburner.google.com

Launched: February 2004; 14 years prior

Current status: Active

what is Feedburner?

FeedBurner is a web feed administration supplier propelled in 2004.[1] FeedBurner was established by Dick Costolo, Eric Lunt, Steve Olechowski, and Matt Shobe. Costolo is a University of Michigan graduate and was CEO of Twitter from 2010 to 2015. FeedBurner gives custom RSS channels and administration devices to bloggers, podcasters, and other online substance distributers. Feedburner is a free web service that enhances bloggers and podcasters’ ability to manage their RSS feeds and track usage of their subscribers. Subscriber overview inside a Feedburner account.

 feedburner logo

What is RSS?

The easiest way to receive the latest posts from your favorite blogs is to subscribe to RSS using feed readers such as Google Reader, Bloglines.

RSS (means Really Simple Syndication) retrieves the latest content from the sites you are interested in and pulls them into your feed reader where you can read them all in one location rather than visiting each site separately.

Most blogs have RSS feed which is detected automatically by commonly used feed readers when the blog URL is added to the reader.

However, if you want to make it more obvious and easier for readers to subscribe using RSS, or want to know exactly how many people subscribe to your blog then the best option is to add a Feedburner RSS feed and email subscription to your blog.

Setting Up Your Feedburner Feed

  1. Go to Feedburner and sign in to Feedburner with your Google Account (create a Google Account first if you don’t have one!).

Selecting your Feedburner Stats options

Adding Your Feedburner Feed To Your Blog

This is used to add the RSS icon and easy subscribe options to your blog sidebar using a text widget as explained below:

  1. Click on the Publicize Tab > Chicklet Chooser in your Feedburner account and copy the HTML code.

Copying the HTML code for your Feedburner Feed

  1. Go to Appearance > Widgets in your blog dashboard
  2. Click on the desired Sidebar to expand (so you can add the widgets) Please note: In new blogs, sidebars in your dashboard are empty and adding widgets automatically removes the default Edublogs widgets
  3. Add a text widget to the desired sidebar by dragging it from the Available Widgets into the Sidebar area on the right
  4. The widget will automatically open — just add the HTML code from FeedBurner, click Save and then Close.

Adding Feedburner HTML to the text widget

feedburner-a

Adding a FeedBurner Email Subscription

It’s important to add an email subscription option to your blog sidebar as some readers prefer to receive latest posts from blogs using email subscription.

  1. Click on the Publicize Tab > Email Subscription in your Feedburner account and click on Activate.

Activating FeedBurner Email subscription

  1. Copy the HTML code.

Copy Feedburner email HTML code

  1. Go to Appearance > Widgets in your blog dashboard
  2. Click on the desired Sidebar to expand (so you can add the widgets)
  3. Add a text widget to the desired sidebar by dragging it from the Available Widgets into the Sidebar area on the right.
  4. The widget will automatically open — just add the HTML code for Feedburner email subscription, click Save and then Close.
  5. Now readers simply enter their email address and then click on “Subscribe” and Feedburner emails your entire post to them on the day after it has been published on your blog.

Redirecting All Your Blog Feed To Feedburner

Unless you redirect all your blog feed to Feedburner you won’t get accurate subscriber numbers because some of your readers subscribe using your original blog feed.

If you’re an Edublogs supporter you can redirect your blog feed  as follows:

  1. Go to Settings Feedburner in your blog dashboard
  2. Add your Feedburner address and click Save Changes.

Redirecting feed to FeedBurner

  1. Now all your feeds are automatically redirected through FeedBurner and you’ll be able to track subscriber numbers accurately.                                                                                                                                                                                                                                                                                                                                             Aiswarya Thampi